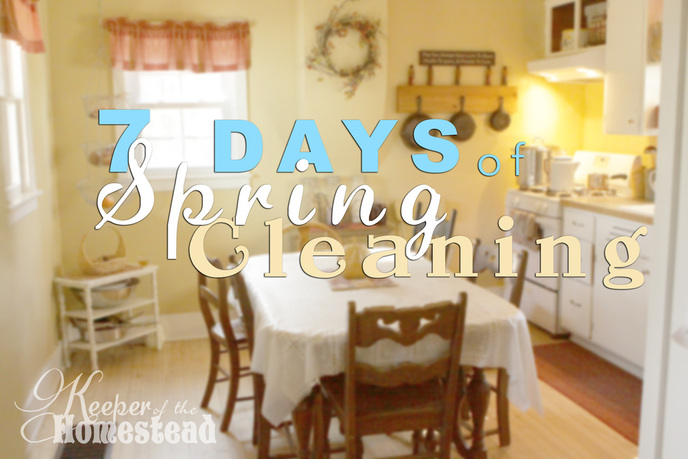
Spring Cleaning
Every home needs a good, solid cleaning once or twice every year. After the long, cold winter, you are ready to open up the windows to allow the light to shine in and the breeze to blow gently across the floors. The light reveals the dirt that has built up over the long time of hibernation indoors. The cold seasons are over with all their pesky germs. It is time to get on you aprons and pull out the old mop. Get tough on your dirt.
It really feels like a huge task but when you take it one day at a time, it is easily mastered. One closet at a time, one drawer, and one room at a time. You will feel so much better sitting in a clean home.
To avoid frustration, try focussing on one particular cleaning task per day. It may help you organize your time better. I created a series of checklists to help you get a good start this year. We have one more day of spring cleaning here at our homestead and it is such a good feeling of accomplishment. Every nook and cranny is decluttered, cleaned, and organized. I am ready for spring!
Day 1.
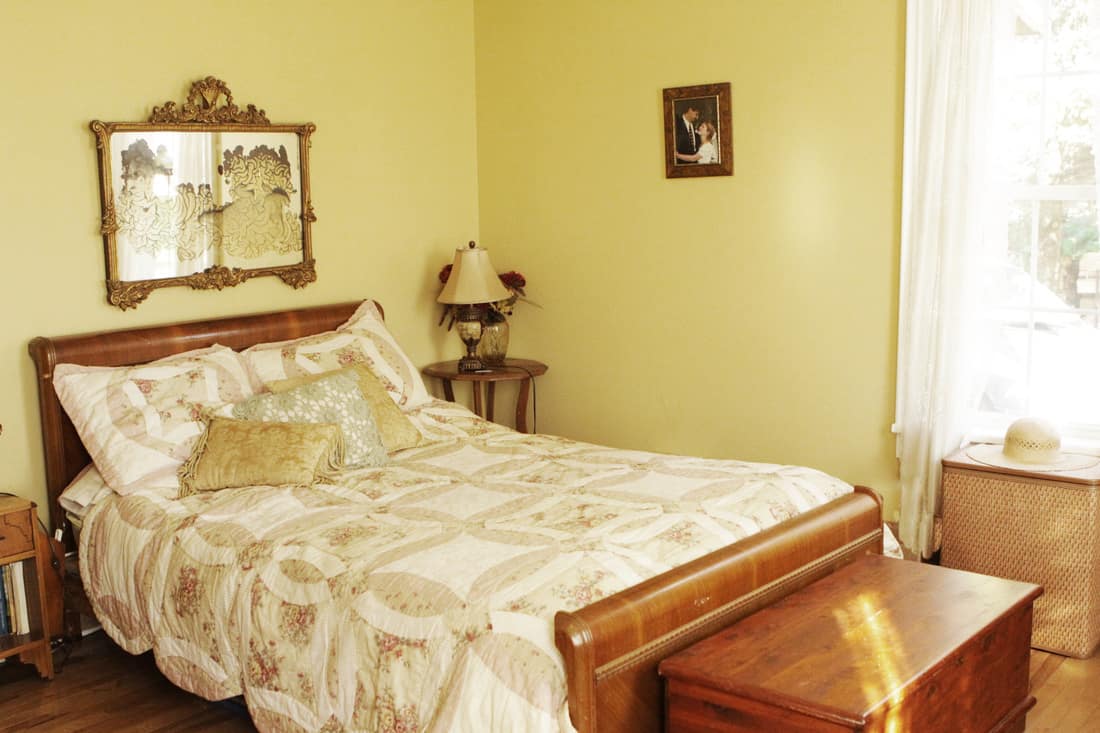
Freshen the Bedding: Wash all the sheets in the entire household. Make a fun day of stripping down each of the beds. This is a great job for little kids. They can feel like good helpers to rip off the sheets.
- Wash the mattress pads
- Pillow coverings
- Quilts, pillow shams
- Pillows (make sure to observe the washing instructions) both decorative and regular head pillows.
- Bed skirts
- The mattress. To freshen the mattress that accumulates tons of dead skin cells and other dust and dirt, sprinkle baking soda over the mattress and then vacuum. I have rented rug doctors to do mattresses using the furniture attachment which really does a great job at getting the sweat, grime, or pee from the occasional bed wetter’s mattress. If you do not use a rug doctor, use the wand attachment to your regular vacuum or a shop vac. I love using my shop vac for things like this.
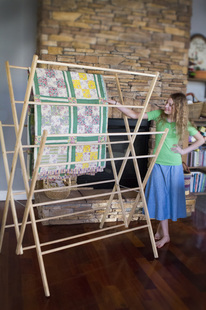
- For a really fresh scent, hang all bedding outside to dry. You can use the clothesline or try our handmade wooden drying racks. The Homesteader can fit either 4 quilts or 2 sets of sheets over it. It is huge.
- Wash the bed frame. Wipe down the entire bed frame to remove any dust and dirt.
Day 2.
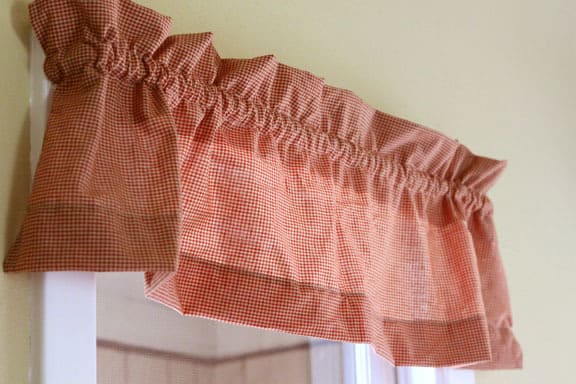
Wash the curtains and windows: There is a ton of dust that accumulates on the curtains. You can take down one to see for yourself. The top will smell like dust and there will be a furry layer of dust. Take all the curtains down in the entire home. Be careful to observe the washing instructions before starting.
While the curtains are washing, get yourself a pail and I will give you the most amazing recipe ever for cleaning windows…
Window Cleaning Solution:
- 2 gallons of water
- 1/2 cup vinegar
- for a fresh scent, 2 drops of lemon essential oil
I learned this recipe and window washing technique from the Amish. It far out preforms any window spray cleaner by a long shot. You need to have one rag for washing and one dish drying towel for wiping dry. Here are a few easy steps…
- Wash down the window on the inside with your wet rag. Then rub over it with the dry towel. You will see that is does not streak at all! It is amazing!
- Pop your window backwards if you have double hung (which is handy) and repeat step one. If you do not have double hung, then you can either pop the window out or wash the window from the outside. Be careful if you have to use a ladder!
- Vacuum the inside frame of the window and screen. Inside the window frame you will find all kinds of nasty things from bugs, to mold, and dirt. The majority of these things can be vacuumed out using the wand of your regular vacuum or by using a shop vac.
- Wash out the frame using your same window cleaning solution and then rubbing dry with a towel.
- Washing the trim. Using the same window cleaning solution, wash the window sill and the top of the trim above the window. Dust will settle on any flat surface and you want to be sure to remove it all.
Day 3.
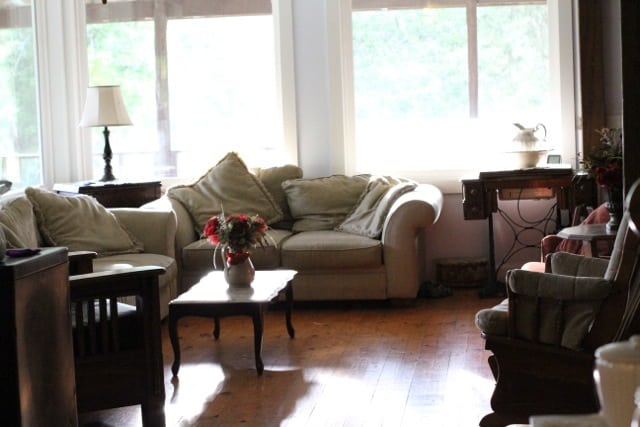
Freshen the Furniture: The furniture in your home is used on a daily basis so it is probably full of dust, old dead skin cells, oily residue, and dirt.
- Fabric sofas and chairs. You can bet these are one nasty cesspool of dust. If you pound your fist on the arm of the couch to reveal a dust cloud, you have a situation! It is best if you vacuum the fabric furniture each week to maintain it, but if not, you will have to do some serious cleaning to remove the dust and grime. I like to rent a rug doctor steam cleaner once a year for my furniture and area rugs. It will freshen them up so nicely. If you can’t rent the rug doctor, you can use baking soda by sprinkling and vacuuming off. That will also deodorize and freshen. When vacuuming, do the dust cloud test to be sure the cushions are free of dust. If you pound on it and a dust cloud still forms, you need to vacuum that area more. For stains, either use the rug doctor, or make your own cleaner by using a 1/2 cup rubbing alcohol mixed with 1 Tablespoon of white vinegar. Blot out stains and rinse well with water.
- Leather sofas and chairs. Vacuum under and around cushions. Wipe down the furniture with a damp cloth and then with a dry towel. For any oily grime spots, use a mixture of vinegar and water (1 cup water + 1 tsp vinegar) to gently cleanse that area.
- Wooden furniture: You will notice the dust settling on any surface that is flat, including below the chairs. Place the chair on a table so you can examine the dust that has settled beneath the seat. Make your own furniture polish to brighten wood and make it shine again. Add 1 cup olive oil to 1/2 cup of lemon juice. Wipe over wood and then, using a towel, rub in and dry off excess oils.
Day 4.
Walls, Ceiling, Fans, and Trim: The walls get dirty! Especially if you heat with wood. We have some black soot on our walls and ceiling.
- Vacuum all cob webs around the corners of the rooms and around the ceiling. You will find more than you think when you are actually looking for them.
- Dust all running boards, which is the trim around the floor.
- One room at a time, using the same window washing solution (2 gallons water + 1/2 vinegar), wipe down the walls. You can get wall and ceiling mops that will make the job a bit easier.
- Wash down ceiling fans because they collect a lot of dust. If you run your ceiling fan without washing the dust off, you will have that dust blow around your room when you finally turn it on when there is a warm enough day.
- Wash light fixtures. Ceiling light fixtures usually fill up with dust and even bugs.
- Dust shelves and even the tops of door frames. Don’t forget the doorknobs!
- Vacuum off lamp shades and dust lightbulbs to reveal more light when using bulb.
- Tough scuffs on wall or trim can be effectively removed by using rubbing alcohol. It works really well. Be careful. If you rub too hard, you can remove paint. I like to rub gently and rinse with water. I have just figured this out after my son drew on our dry erase board with a permanent marker. I washed it all off with rubbing alcohol. It is like a miracle cleaner for all hard to remove stains.
Day 5.
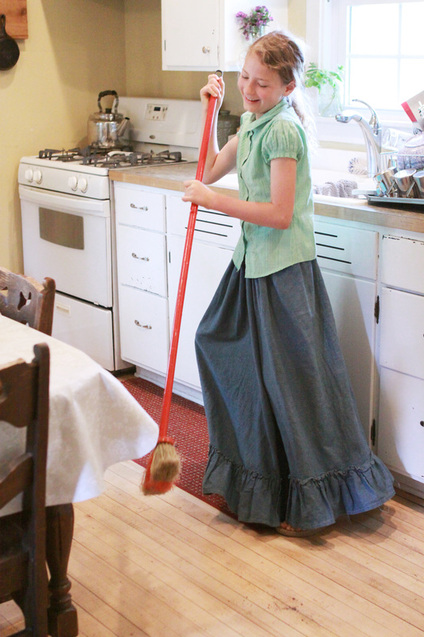
Kitchen: The kitchen is a room that really needs a good spring cleaning. Cooking will cause grease to settle on every surface in the kitchen, so it is imperative to give the kitchen a good once over.
- Cabinets. Wash all cabinet faces and drawers off with this great degreaser (1 gallon hot water + 1/2 cup vinegar + 2 drops of lemon essential oil + 1 tsp dish soap). Don’t forget the nobs and handles. Every surface the human hand touches has germs and bacteria, oils and residue.
- Inside drawers and cabinets. Empty out drawers and vacuum out. Wash with the degreasing solution and put items back into the drawer in a more organized fashion. Make sure all like items are together in one place.
- Refrigerator. Take everything out. Assess what things are living and growing mold on them. Toss out all outdated and spoiled food or condiments. Wash the outside of any containers. Vacuum out drawers and wash with degreaser (make a fresh batch – 1 gallon hot water + 1/2 cup vinegar + 2 drops of lemon essential oil + 1 tsp dish soap). Wash outside of refrigerator as well as the handle. When putting items back into refrigerator, make sure to have food sections to further organize your groceries. Have a section for dairy, one for meats, one for veggies, and one for fruits. That way you will always know right where to find the food you need when you need it. Don’t forget to clean the top of the refrigerator off.
- Stove (Make a fresh batch of degreaser- 1 gallon hot water + 1/2 cup vinegar + 2 drops of lemon essential oil + 1 tsp dish soap)). Vacuum out the drawer of the stove and inside the stove. If you have burners, vacuum out under the burners and take the grills off. Wash the grills and the oven racks. Using the degreaser, wash out the entire bottom and inside walls of the oven. After it is clean inside, work on the outside. Wash the nobs off by removing them and wiping down behind where the nobs sit on the stove. Wash the top and the outside of the door with the handle, until it shines. I do not use aluminum foil much, but a good use is to layer the bottom of your stove with foil to catch food that boils over or drips down. It will save you a ton of cleaning time in the future. When ever the foil looks disgusting, just throw it out and replace with another clean piece.
- Sink. The sink is a yucky place. It is good to bleach out the sink if it is white porcelain. If you scour it with baking soda it could leave scratches. I have always just filled my sink up with a mixture of water and about one cup of bleach. I let is soak and the stains come off really well. If they are tough stains, dab pure bleach on it and it will come off within a few minutes time. If you have stainless, you could use the same degreasing solution or a scrubbing paste made from baking soda and enough vinegar to make it wet like toothpaste. Use an old tooth brush to get the grime off around fixtures and around sink base with your paste. Rinse with water and dry for a nice bright shine.
- Decorations. Wash all decorative items off as well. Using the degreasing solution, rub off all nicknacks and wall hangings. If you have silk flowers or plants, you should bring them outside to shake out the dust before you wash them. Wash them in water and allow to drip dry. They will look bright and fresh all over again.

Day 6.
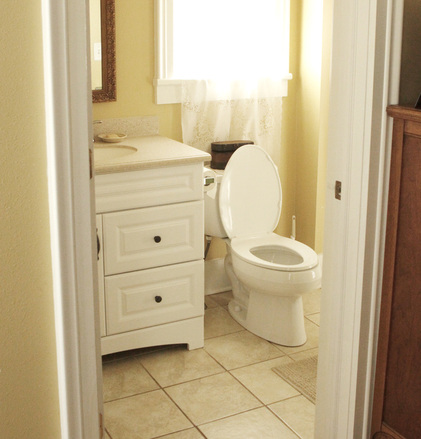
Bathrooms: Bathrooms are a dirty place to begin with. Most people neglect the bathroom. I do not. I clean my bathrooms almost every day. With people using the toilet, there are lots of germs and bacteria. Some people have their bathrooms smell like a urinal. A man’s urinal. I can not stand that smell, so I routinely clean up after use each day. Here are some tips for spring cleaning the bathroom…
- Sink. Clean the sink with the same degreasing solution or a scrubbing paste made from baking soda and enough vinegar to make it wet like toothpaste. Use an old tooth brush to get the grime off around fixtures and around sink base with your paste. Rinse with water and dry for a nice bright shine.
- Mirror. Use the window washing solution (for a small batch combine 2 cups water 2 tablespoons of vinegar.) Wash the mirror and dry with a towel to reveal the perfect shine of your reflection:)
- Tub and shower. Use the degreaser (1 gallon hot water + 1/2 cup vinegar + 2 drops of lemon essential oil + 1 tsp dish soap) or scrubbing paste made from baking soda and enough vinegar to make it wet like toothpaste. Scour all dead skin cells from the walls of the shower. After the fixtures are clean and walls are rinsed down and wiped clean, dump all the baking soda cleaner down the drain along with the vinegar mixture. It will act as a drain de-clogger as well.
- Toilet. Use a scrub brush to clean the inside of the toilet bowl out with vinegar and baking soda. Make sure to get all the scum off. Wipe down the entire toilet (the seat top and under the seat, the rim of toilet, behind the seat where the hinges are, around the base of the toilet, the top of the toilet as well as the flushing handle.
- Rust. If you have a rust issue in the tub and toilet, I recommend using the Works brand toilet cleaner for quickly removing all rust. I use the toilet brush and works cleaner on the bathtub as well to remove that pesky rust. It really works!
- Sweep the floor and wash the floor. Make sure to get around the bottom of the sink and toilet.
- Wash the shower curtain. If you have a white shower curtain, take it down first. You can soak it in bleach water for about 10 minutes in a pail and then rinse out. It will take all soap scum off and make it look fresh and new again. Hang it back on.
- Wash all the towels that are hanging around. Lay out all fresh towels for a brand new start.
Take a day off when you need to 🙂
Kick back and enjoy the outdoors.

Day 7:
Floors. The last thing you do is all your floors.
- Shake out or vacuum all rugs and sweep under all the furniture.
- Move everything including the refrigerator, stove, laundry machines, and other furniture. You will be surprised how many things collect under the couch, behind the fridge, under the beds. Wow, it is like Christmas all over again. You find a zillion lost treasures. Even though I am a clean freak, I still find things under my furniture that I never thought was possible.
- Mop under everything. I like to have an old sock hanging over my mop pail so I can easily grab it to power off tough grime spots. I use it around the edges and corners. You could never possibly get the edges and corners clean with a mop. This is a good practice.
- Wash small area rugs in the washing machine if they are washer safe. If not, bring them outside to give them a flush of the hose to get the ground in dirt out. Hang out to dry. If you have a lot of carpets, now is the time to rent the rug doctor. Steam clean all your area rugs or carpeting. They will look so fresh.
Enjoy Your Fresh Clean Home!
There is nothing so satisfying to a keeper of the home as a freshly spring cleaned home. Everything is bright and shining. Everything is in place and you are ready for a fun spring.
It is not Monday, but I did enter this post into a Homestead Barn Hop, which is really fun to look at what other bloggers are sharing…click on the image below to view other shares.


12 thoughts on “7 Days of Spring Cleaning”
Where could I find a wall mop?
Do you have a daily/weekly/monthly chore list? I need a system! Most I come across are too detailed (more like your spring cleaning list here) for the monthly duties, or not detailed enough! Any tips? Thank you!
Hello, I wanted to ask what kind of essential oil product you use for your cleanung. I tried clicking on the blue words but it send me to a site that was not working. I watch your YouTube channel and I like it. It motivates me to clean. Please reply. Thanks you
Love this post so very much. I just saved it for future in Pinterest 🙂
Nice post! I’m just starting my big cleaning before Christmas and all your suggestions are very good reminders for me. The lists for each room and for each day are quite detailed and the cleaning solutions are very effective. Although it’s called “7 days of spring cleaning”, I’m going to use your post as “7 days of cleaning before the holidays begin”. Thank you for sharing all these great hints!
This is a great step-by-step guide! I love spring cleaning time because the house seems brighter, smells better and looks better!
Wow, you are amazing. I’ve watch you video’s and read your blogs for one evening and learned soooooo much. And this post about spring cleaning is so handy!!
Thank you so much for all your effort!!!
(I make my own kitchen-cleaning product with 1 tbs dish soap, half a gallon of vinegar, water and 1 tsp of baking soda. Works so good!!)
Guys, this is what I did this year for my spring cleaning! With a small difference, though. I couldn’t do it for a week but for a month. We live in a small apartment and I work full time, so the first week I cleaned the living room, after that the kitchen and for the last two weeks – the bedroom and the bathroom.
I saw your link from NGJ and had to tell you just how much my girls (I have 5 girls, no boys) and I are enjoying watching your Homesteading videos. You are adorable! We currently live in a subdivision (not by choice) and are waiting on the Lord to move us back down south and to the country. During this time we are preparing/building the tracks before the train which is why we’re watching your videos. I also read the recent article by you about needing a miracle. I was abused as well. :/ Your article touched my heart.
*hugs!*
Kristy
I hear you on “waiting on the Lord”! We are waiting too. Have a 5bed house in the country in TX for sale! LOL
Great! My daughter made me laugh when we got to the photo with the ‘bathroom day’: “Wow, even their toilet is pretty! Look at that pretty toilet!” LOL. We enjoy doing these ‘cleaning bees’, too! And so much more fun with children by your side ^_^
That is so cute. Thank you for sharing about your daughter. It has truly made me smile!